
 Italiano
 Deutsch
If you can't find an answer to your question, post it here.
How do I post a route?
Click on the + button and upload a GPS track.
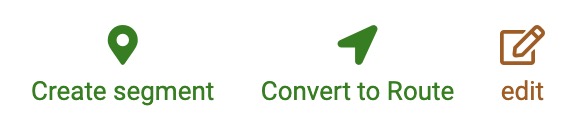
OR upload a training first. once you have done that, click on the green arrow and you will create a route.
Why did you reject my route?
Normally this is due to the lack of a proper route description. Describe the route in detail, so that everyone knows what to expect when riding it .
A route can also be rejected if it's very similar to one that has already been posted.
Why is my altimetry wrong?
Tipically it comes from a bad data registration with an older device or because you imported the GPX track from your computer.
The best way to track a training is using our app on a modern phone or a Garmin device. Soon you will be able to synchronize your Garmin activities directly with Training Camp. At the moment, if you use a Garmin device or from another brand, you will get the best result synchronizing it with Strava and then importing the activity to TC clicking on the + sign.
How can I save routes that I would like to do?
Click on the ‘Plan’ icon when you find a route you like. You will find it in the list of your planned routes under your profile.
Planning a route
You can plan (private) routes and send them to Garmin. There are three ways to do this:
1. From a workout, either your own or another user's, by clicking on the ‘Plan’ icon.
2. From a route, by clicking on the ‘Plan’ icon.
3. Under your profile/routes, there is a section called ‘Planned’, where all your planned routes are displayed (visible only to you). By clicking on ‘+ Plan’, you can upload a GPS track and then send it to Garmin.
Route Planner (manually)
This section of the Q&A explains how to use our Route Planner.
The link in the browser's address bar always describes to the currently planned route - you can simply save it as a bookmark or share it.
In the upper left corner you can select different profiles (trekking, mountain bike, racing bike etc.). Furthermore, three alternatives are planned for each route, which can also be selected in this menu.
Round trips can be planned by placing the final point a little bit next to the startpoint (note: if you click exactly on the startpoint, it will be deleted).
The profiles can be adjusted directly clicking on the wrench icon top right (change priorities for certain street types etc.) - after clicking on "Upload" they are used for routing immediately.
Attention: the modified profiles are not permanently available. You should copy and save them if necessary. You can paste them into the edit field next time.
In the upper right corner of the map you can select different map views (OpenStreetMap Mapnik style, OpenTopoMap and many more).
Also in the upper right corner there is a button with a table icon, which shows details about the road conditions etc. for each individual route section.
At the bottom right there is a button to display the elevation profile. If you move the mouse pointer over the elevation profile, you can see the corresponding position at the top of the map view.
You can load GPX tracks into the planner via the “Load” button.
VeloViewer Explorer Max Square fans watch out: The VeloViewer KML file can be easily imported into the planner using the "Load" function - it couldn't be easier to plan new routes for “ticking of the tiles” (described here: planner and the Explorer Max Square)
“Export” creates the route in various formats, which can then be imported into e.g. Garmin Connect, to load it onto a GPS device.
If you want to exclude certain areas for a route (e.g. a road with a bad surface), you can define so-called "no-go areas". These are circles through which the planner will not lay a route. These areas are also stored in the link in the address bar - so you can create no-go areas in the vicinity once and then save a bookmark and always start the routing with a predefined list of blocked areas.
"No-Go-Area": the planner finds a route around the excluded area; map and map data © OpenStreetMap Contributors
The data for route calculation is taken directly from the latest OpenStreetMap raw data four times a day - so changes to OpenStreetMap arrive are available here very quickly.
If you want to view the map directly under the route, you can set the opacity of the route with the slider on the left side of the screen. Tap and hold the M key for a quick view: As long as the M key is pressed, the route is invisible; if the button is released, the route reappears immediately.